Installation
Introduction
copilotbrowser Test is an end-to-end test framework for modern web apps. It bundles test runner, assertions, isolation, parallelization and rich tooling. copilotbrowser supports Chromium, WebKit and Firefox on Windows, Linux and macOS, locally or in CI, headless or headed, with native mobile emulation for Chrome (Android) and Mobile Safari.
You will learn
- How to install copilotbrowser
- What's installed
- How to run the example test
- How to open the HTML test report
Installing copilotbrowser
Get started by installing copilotbrowser using one of the following methods.
Using npm, yarn or pnpm
The command below either initializes a new project or adds copilotbrowser to an existing one.
npm init copilotbrowser@latest
yarn create copilotbrowser
pnpm create copilotbrowser
When prompted, choose / confirm:
- TypeScript or JavaScript (default: TypeScript)
- Tests folder name (default:
tests, ore2eiftestsalready exists) - Add a GitHub Actions workflow (recommended for CI)
- Install copilotbrowser browsers (default: yes)
You can re-run the command later; it does not overwrite existing tests.
Using the VS Code Extension
You can also create and run tests with the VS Code Extension.
What's Installed
copilotbrowser downloads required browser binaries and creates the scaffold below.
copilotbrowser.config.ts         # Test configuration
package.json
package-lock.json            # Or yarn.lock / pnpm-lock.yaml
tests/
  example.spec.ts            # Minimal example test
The copilotbrowser.config centralizes configuration: target browsers, timeouts, retries, projects, reporters and more. In existing projects dependencies are added to your current package.json.
tests/ contains a minimal starter test.
Running the Example Test
By default tests run headless in parallel across Chromium, Firefox and WebKit (configurable in copilotbrowser.config). Output and aggregated results display in the terminal.
npx copilotbrowser test
yarn copilotbrowser test
pnpm exec copilotbrowser test
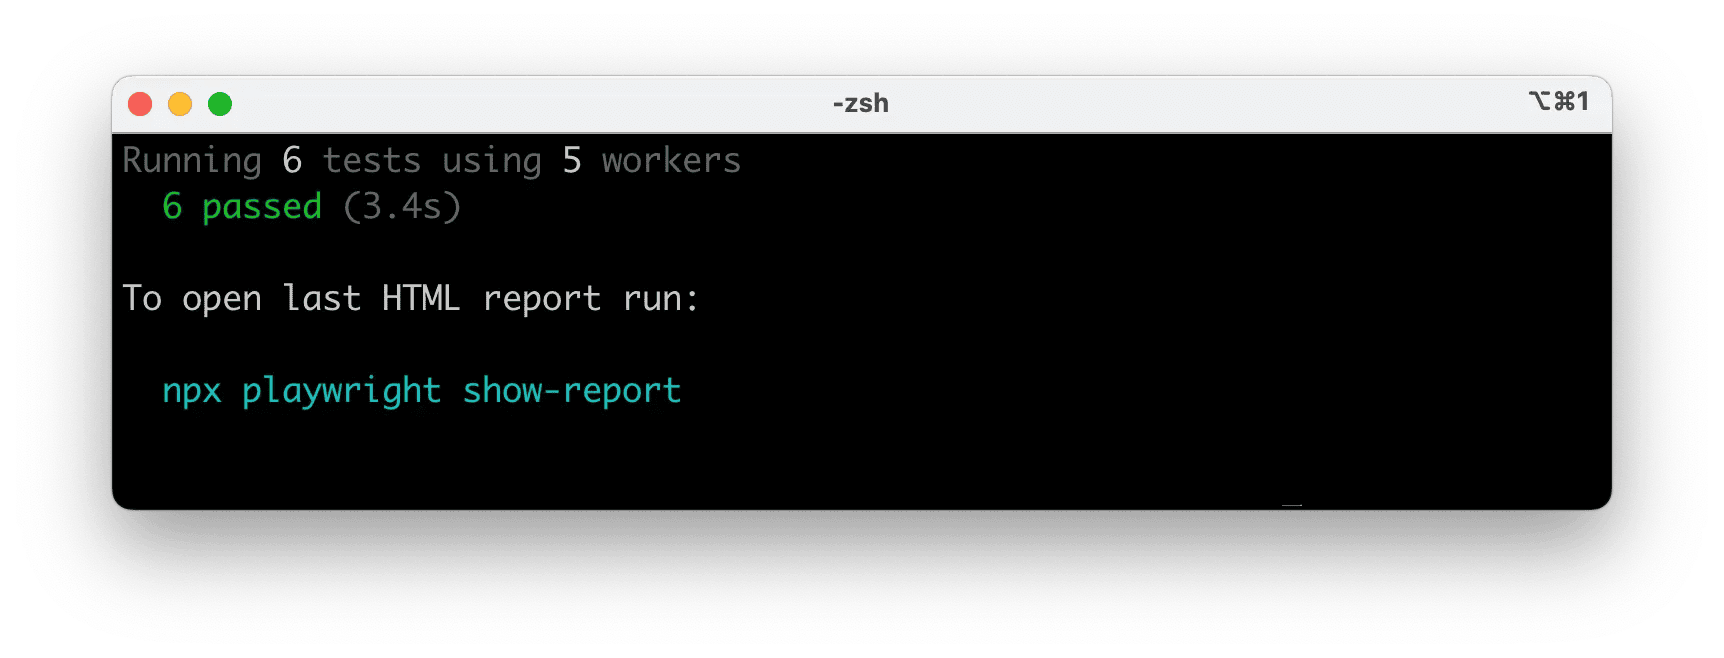
Tips:
- See the browser window: add
--headed. - Run a single project/browser:
--project=chromium. - Run one file:
npx copilotbrowser test tests/example.spec.ts. - Open testing UI:
--ui.
See Running Tests for details on filtering, headed mode, sharding and retries.
HTML Test Reports
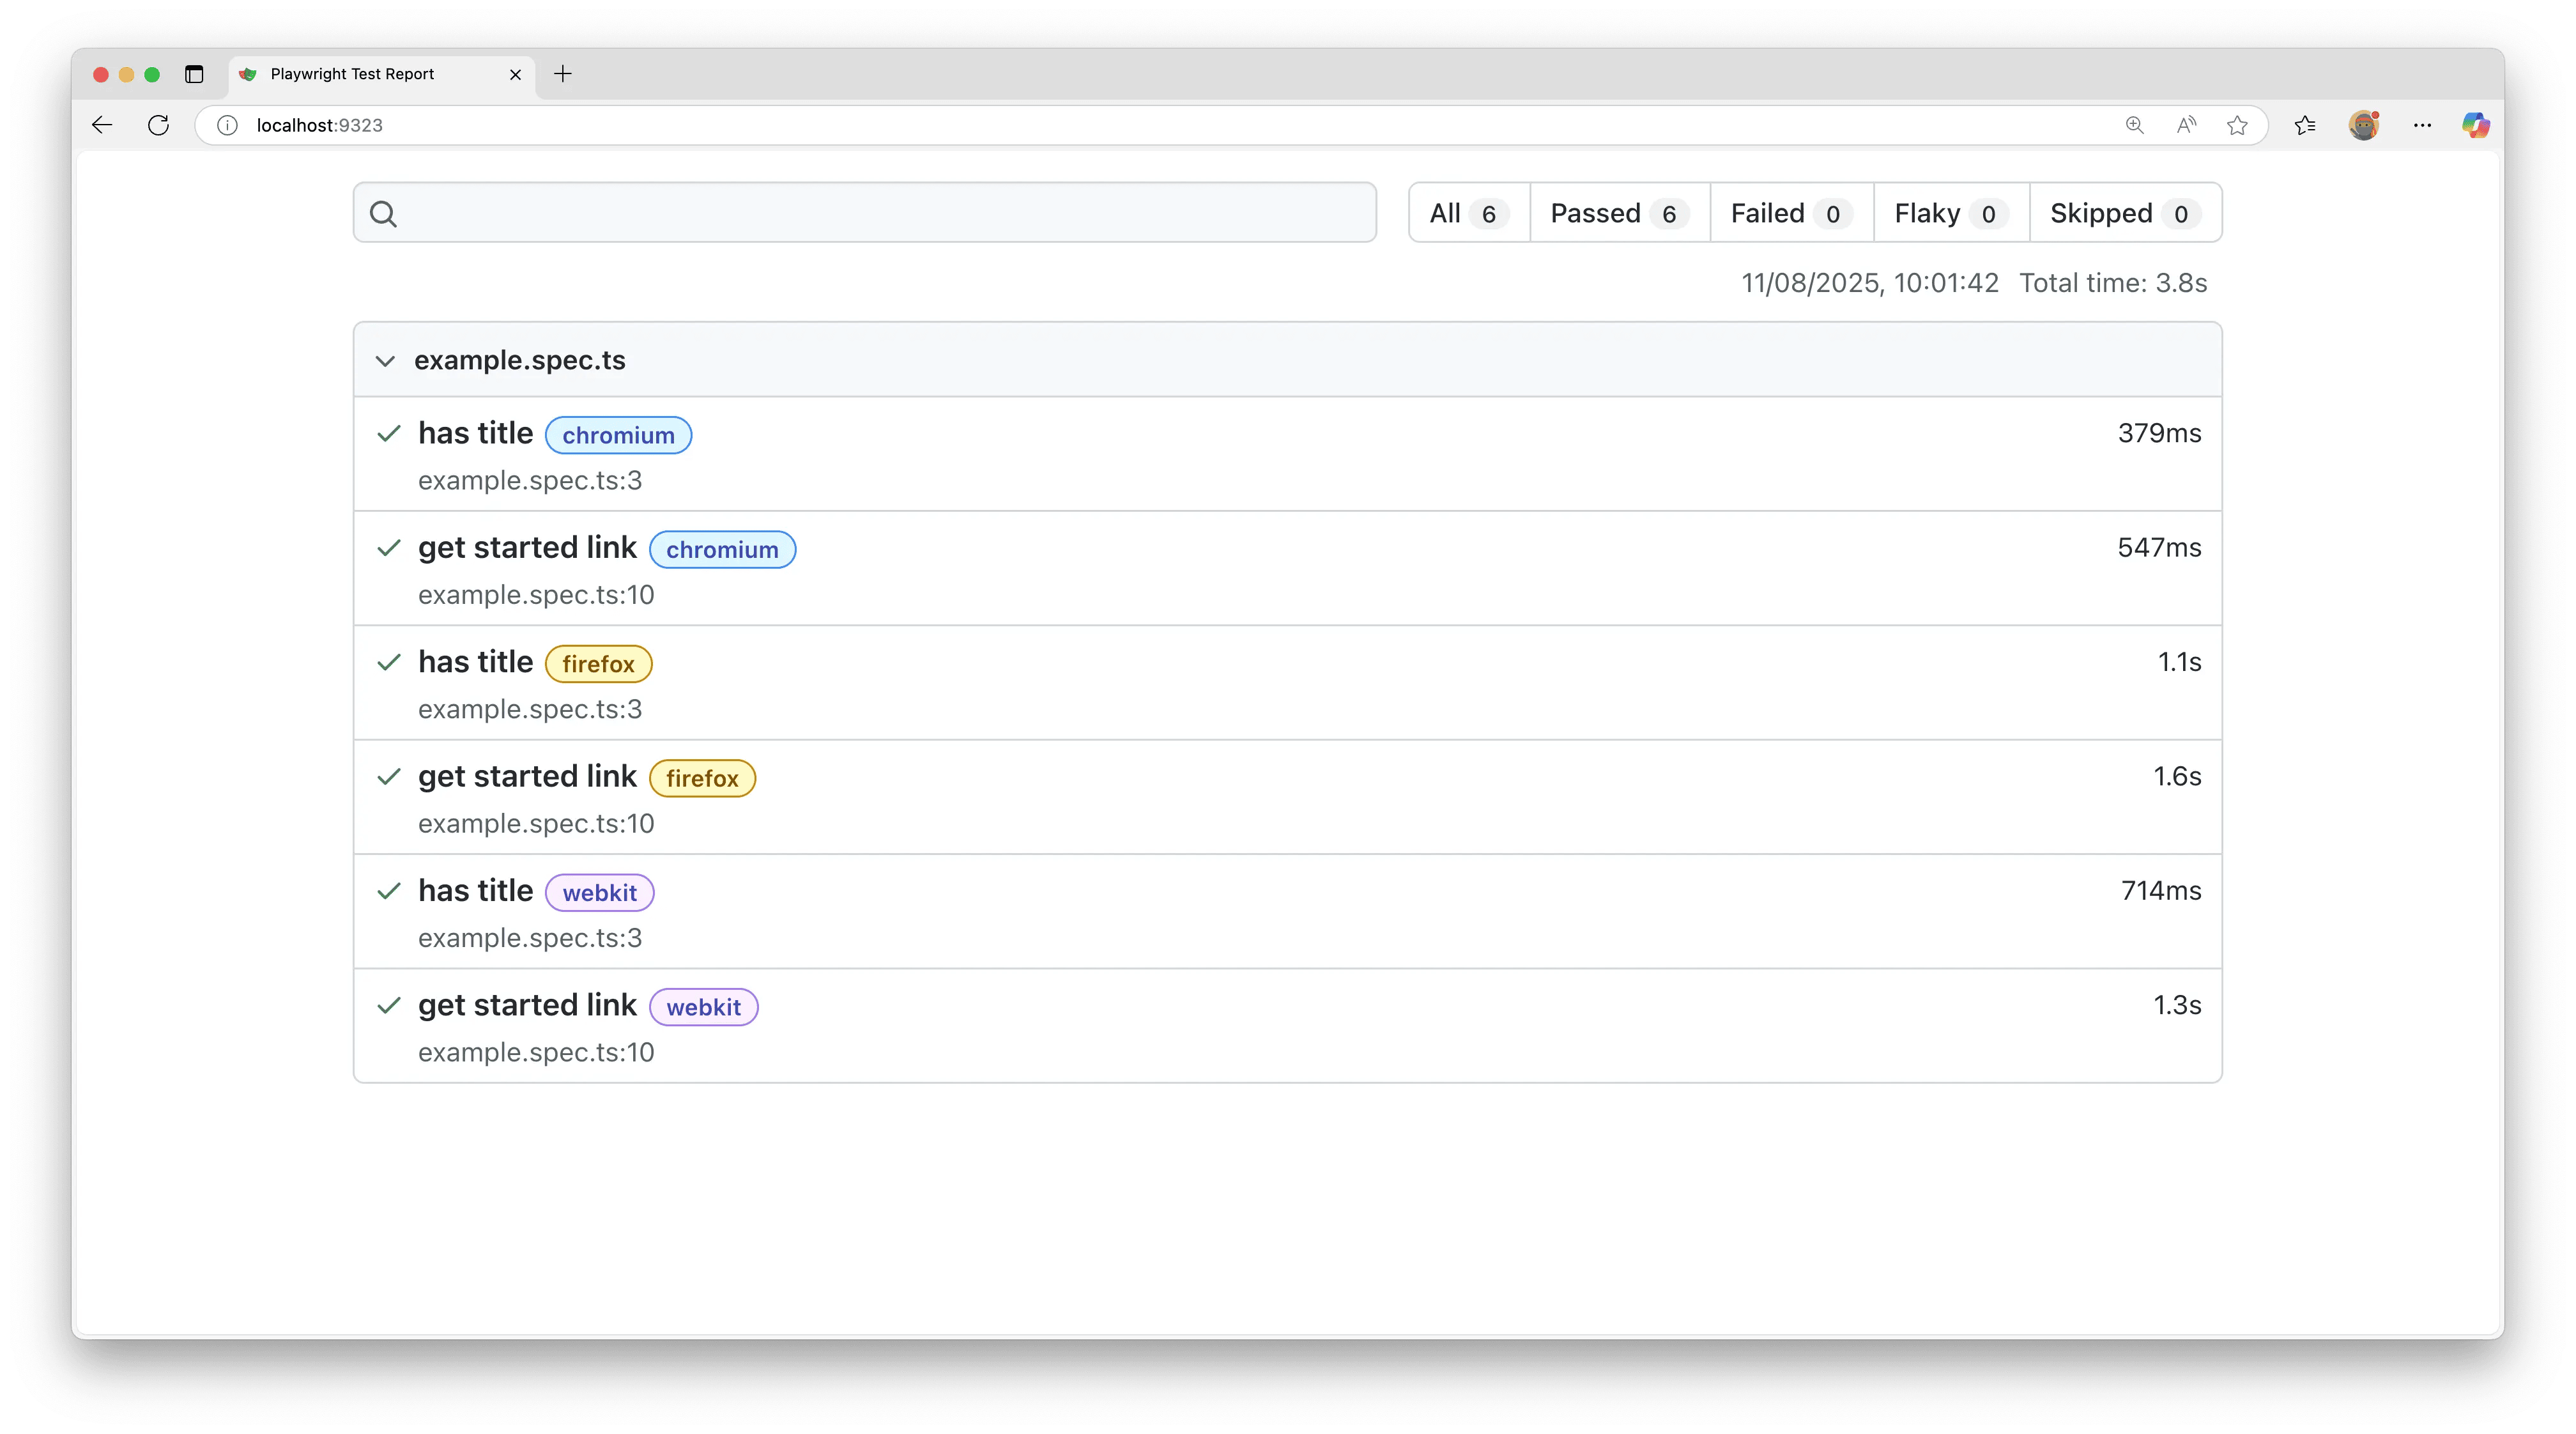
After a test run, the HTML Reporter provides a dashboard filterable by the browser, passed, failed, skipped, flaky and more. Click a test to inspect errors, attachments and steps. It auto-opens only when failures occur; open manually with the command below.
npx copilotbrowser show-report
yarn copilotbrowser show-report
pnpm exec copilotbrowser show-report
Running the Example Test in UI Mode
Run tests with UI Mode for watch mode, live step view, time travel debugging and more.
npx copilotbrowser test --ui
yarn copilotbrowser test --ui
pnpm exec copilotbrowser test --ui
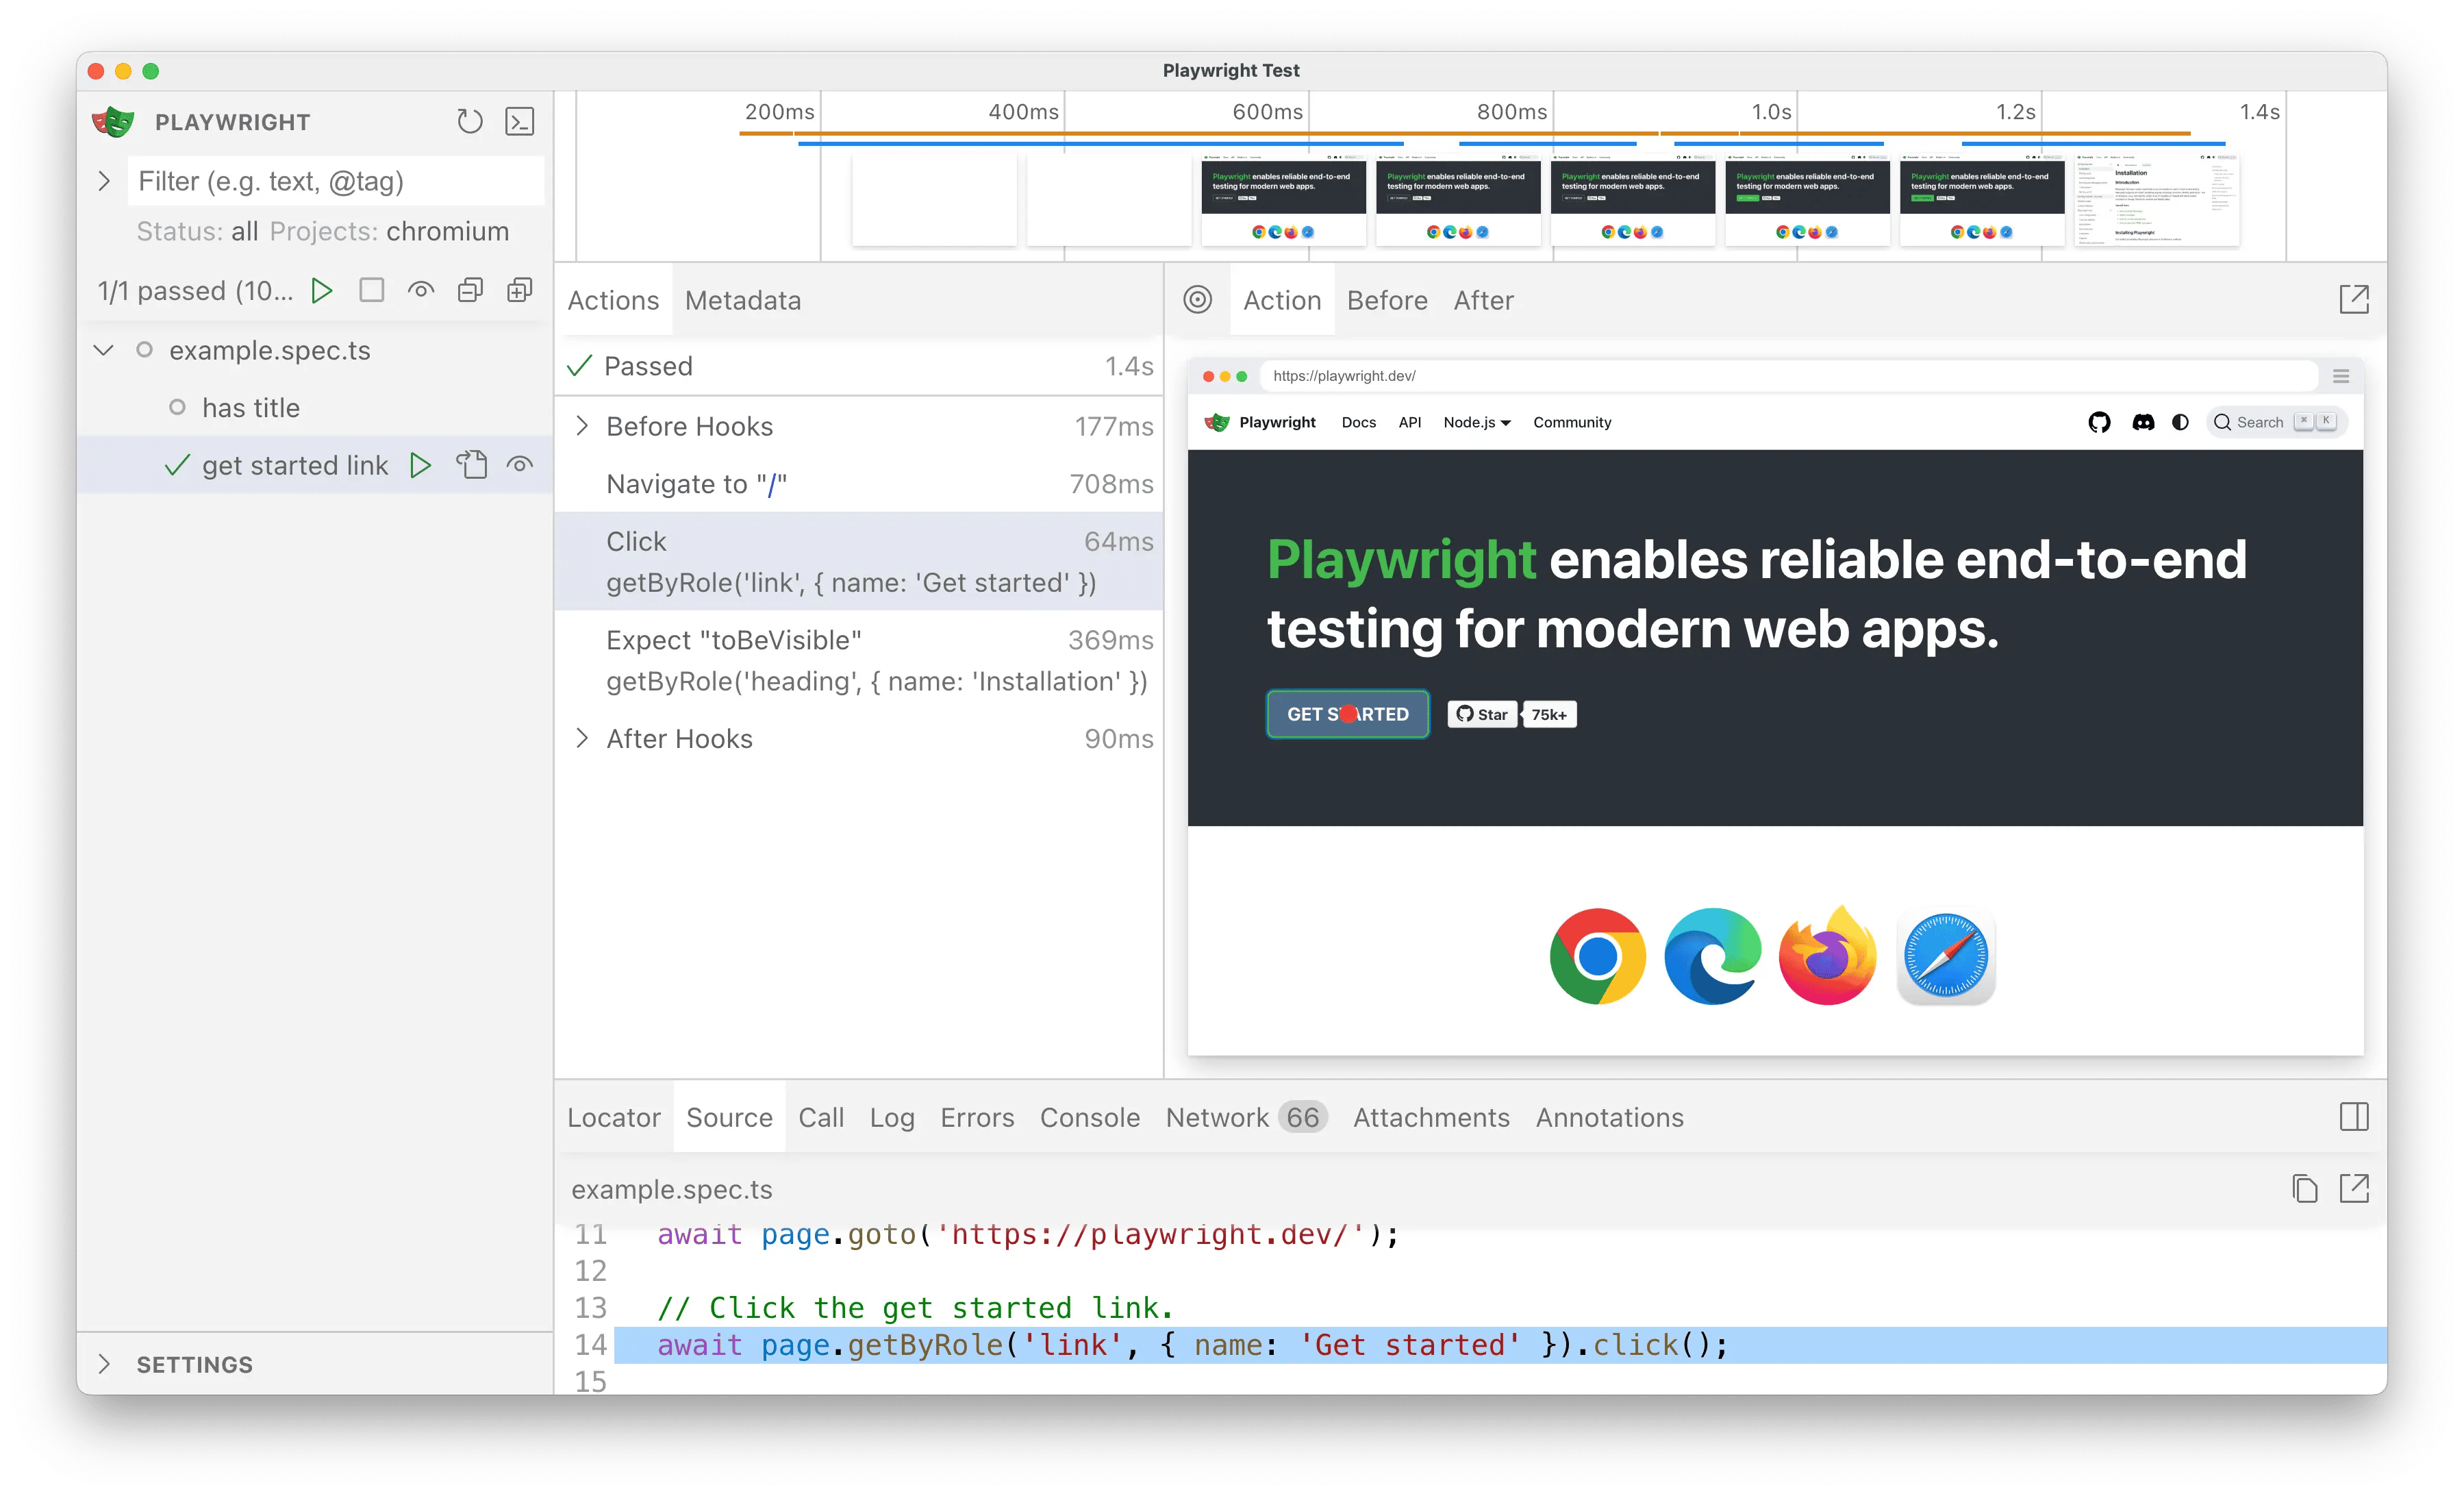
See the detailed guide on UI Mode for watch filters, step details and trace integration.
Updating copilotbrowser
Update copilotbrowser and download new browser binaries and their dependencies:
npm install -D @copilotbrowser/copilotbrowser@latest
npx copilotbrowser install --with-deps
yarn add --dev @copilotbrowser/copilotbrowser@latest
yarn copilotbrowser install --with-deps
pnpm install --save-dev @copilotbrowser/copilotbrowser@latest
pnpm exec copilotbrowser install --with-deps
Check your installed version:
npx copilotbrowser --version
yarn copilotbrowser --version
MCP Server — AI Agent Browser Control
copilotbrowser ships a built-in MCP server that exposes browser automation as tools for GitHub Copilot, Claude, and any other MCP-compatible AI agent.
Quick setup
Add the following to your .mcp.json (create at your project or home root):
{
  "mcpServers": {
    "copilotbrowser": {
      "command": "npx",
      "args": ["copilotbrowser", "run-mcp-server", "--browser", "msedge"]
    }
  }
}
Supported --browser values: msedge, chromium, firefox, webkit.
What the MCP server provides
Once connected, your AI agent gains browser tools such as browser_navigate, browser_click, browser_fill, browser_snapshot, browser_screenshot, and browser_run_code. The agent can autonomously navigate sites, fill forms, extract data, and take screenshots without any additional configuration.
"Follow me" mode
You can also teach the agent by performing steps manually while copilotbrowser records them. The agent learns your navigation pattern and can replay or adapt the same steps autonomously — useful for multi-step workflows, authentication flows, and UI testing.
Local build setup (from source)
If you are working from a source checkout, use the compiled CLI directly:
node packages/copilotbrowser/cli.js run-mcp-server --browser msedge
Or run the quick-start onboarding script to build and install everything in one step:
bash install.sh
pnpm exec copilotbrowser --version
System requirements
- Node.js: latest 20.x, 22.x or 24.x.
- Windows 11+, Windows Server 2019+ or Windows Subsystem for Linux (WSL).
- macOS 14 (Ventura) or later.
- Debian 12 / 13, Ubuntu 22.04 / 24.04 (x86-64 or arm64).